Aircast Ankle Cold Therapy Cryo/Cuff
The Aircast Ankle Cold Therapy Cryo/Cuff is specially designed to treat the symptoms of ankle injury. The cuff uses localised compression with cold to minimise hemarthrosis and help alleviate pain and swelling in that area. This process is called cryotherapy.
Please note that this product must be used in conjunction with the Aircast Cold Therapy Cooler. (See 'Which Cooler Unit Should I Choose?' for more information on which cooler to buy).
Who Can Use the Cuff?
The cuff is specially designed for patients who have sustained an ankle injury and are looking to ease symptoms such as pain and swelling.
Does the Cuff Cover the Whole Ankle Area?
The cuff is anatomically designed to cover the entire ankle, providing maximum cryotherapy to that area.
What Are the Benefits of Cryotherapy?
There are a number of benefits that come from using Cryotherapy. These are:
- Numbs pain
- Improves joint function
- Decreases muscle tension
- Improves circulation
- Decreases swelling
What Size Should I Choose?
The Ankle Cold Therapy Cryo/Cuff is supplied in a universal size that should be suitable for most adults.
Which Cooler Unit Should I Choose?
The Aircast Cryo/Cuff system can be used with either one of two cooler units depending on your needs. Both cooler units offer six to eight hours of gravity-fed compression therapy, but differ in the amount of compression therapy they can provide. The two cooler units are:
How Do I Use the Ankle Cuff?
For a step-by-step guide on how to use the Cryo/Cuff, please see below:
Step One: Prepare Cooler
Fill the cooler with water and add ice to the top section of the unit. Connect the blue tube and place the insulation disk on top of the water before closing shut. Leave for approximately five minutes to allow the water to cool, shaking the cooler occasionally.
Step Two: Apply Cuff
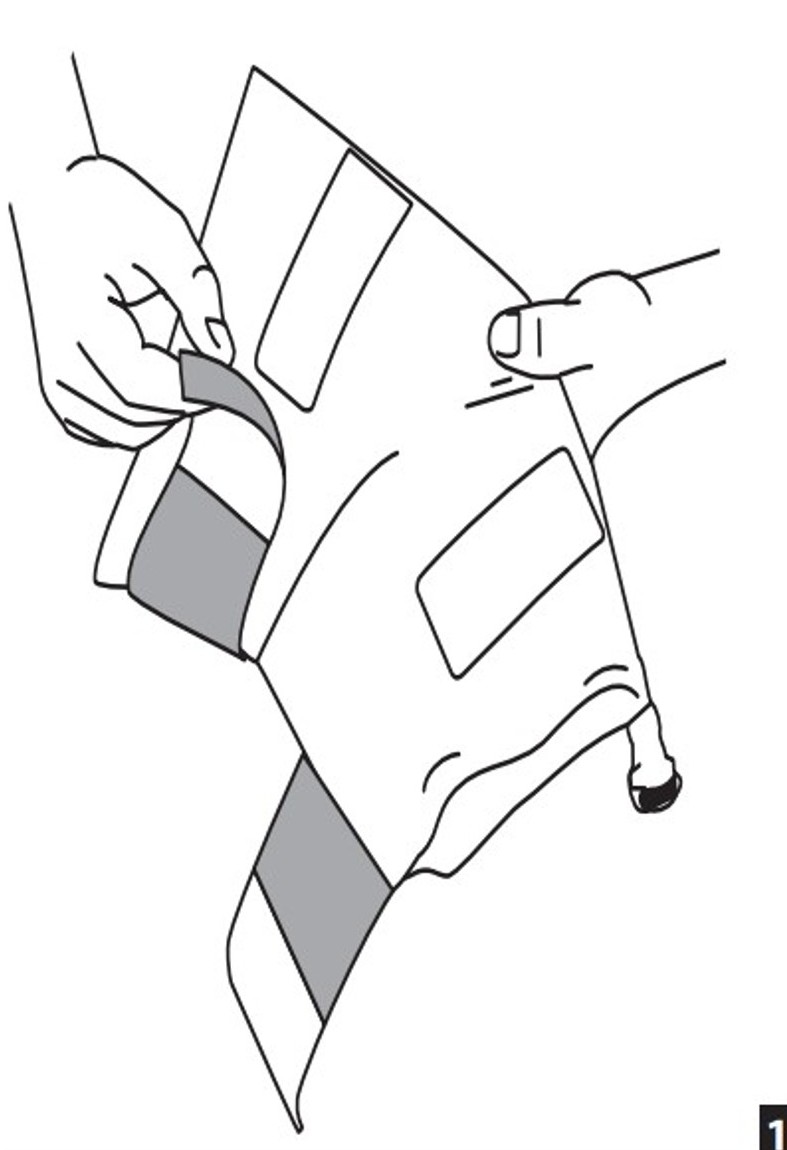
Fasten the flaps under the foot and put on, positioning your heel at the back of the cuff. Wrap the cover around the foot and secure using the straps provided. (See figure one). Repeat this with the ankle cover. (See figure 2).

.jpg)
Step Three: Fill Cuff
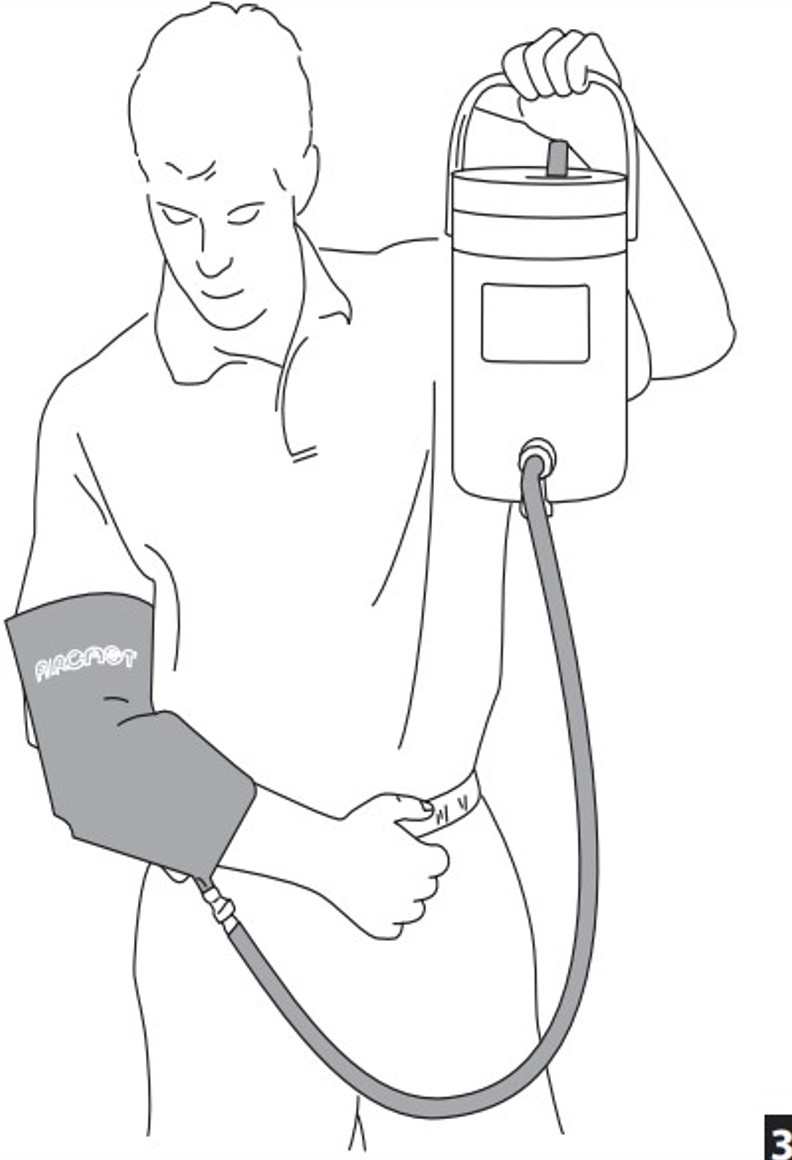
Connect the blue tube to the cuff and open the cooler air vent. Raise the cooler no more than fifteen inches above the cuff and allow fifteen seconds for the cuff to fill. Close the air vent and disconnect the cooler by pressing the metal tab. (See figure 3).

Step Four: Re-Chill Water
Reconnect the blue tube to the cuff, holding it above the cooler to allow the cuff to drain. Allow up to two minutes for the water to chill.
For more information about user instructions, please see the manual below:
How Long Should I Use the Cryo/Cuff For?
You can use the cuff for up to two hours per session. We recommend that you leave at least twenty minutes between treatments.
Do I Need to Protect My Skin During Treatment?
Yes, we recommend that you wrap the skin of the affected area loosely with a cloth or bandage before use, to create a barrier between the cuff and skin. At no point should the cuff be in direct contact with the skin.
How Do I Clean the Cryo/Cuff?
To clean, drain the cuff of water and wash with soap and hot water before rinsing. This process can also be used to clean the cooler and tube.
See the Cryo/Cuff for Yourself
For more information about the Cryo/Cuff, watch the video below:
What If I Have Pain and Swelling in Another Area?
We have a number of Aircast Cryo/Cuff products that help treat injury in almost any area of the body. View them all on our Aircast Cryo-Cuff range page.


